That damp, musty smell coming from below your feet in your Williamsburg, VA, home isn’t just unpleasant. It’s a sign that your crawl space is holding moisture, which can cause serious damage to your home. A crawl space vapor barrier is one of the most effective ways to combat this hidden threat.
You’ve probably wondered what’s really happening in that dark space under your house. A vapor barrier can make a huge difference, protecting your home’s foundation and your family’s health. This simple installation can be a critical part of your home’s overall moisture control strategy.
Think of a vapor barrier, also known as a vapor retarder, as a protective shield for your home. It’s a large sheet of plastic that covers the entire dirt floor of your crawl space. This layer of vapor retarder material helps stop water vapor from the ground from rising and affecting the rest of the house.
While no barrier can stop moisture completely, it slows diffusion enough to prevent major problems. The plastic sheeting is typically a tough polyethylene, and you’ll want a thickness of at least 6 mils, which is 0.006 inches. Thicker options are available, providing more durability against punctures.
These space vapor barriers are essential components of the building envelope. They help maintain the structural integrity and improve the indoor air quality of the entire home. Different sheet materials have different abilities to stop moisture movement.
The ability of a material to prevent moisture from passing through is measured by its permeance, or perm rating. The International Residential Code categorizes vapor retarders into three classes based on this rating. Understanding these classes helps in selecting the right materials for different parts of a home.
A Class I vapor retarder is considered a true vapor barrier because it’s impermeable, with a perm rating of 0.1 or less. A Class II vapor retarder is semipermeable, while a Class III vapor retarder offers the least resistance but still provides some moisture control. For crawl spaces, a Class I retarder, such as polyethylene sheeting, is standard.
Moisture is a quiet enemy of your home’s structure. In many crawl spaces, you can’t see the moisture damage happening until it becomes a huge problem. This hidden moisture can lead to several serious issues that affect your home and health.
Damp, dark spaces are the perfect breeding ground for mold and mildew. These fungi can grow on your insulation and wood framing. They release spores that harm the indoor air quality, which can lead to respiratory issues and that persistent musty odor in your indoor air.
Your home stands on wooden structural elements, including beams, posts, and floor joists. When wood stays wet for a long time, it begins to rot from fungus. This weakens the very foundation of your house and can lead to costly structural repairs.
Wet insulation also loses its effectiveness. Damp insulation has a lower thermal resistance, meaning it doesn’t insulate as well. This can lead to higher energy bills as your heating and cooling systems work harder.
A damp crawl space is an open invitation for pests. Termites, carpenter ants, rodents, and other pests are drawn to moist environments. Effective moisture control makes your home a much less attractive place for these unwelcome guests.
Adding a vapor barrier is a fairly inexpensive project with a huge payoff. It protects your investment and gives you peace of mind. Here are some of the best reasons to get it done.
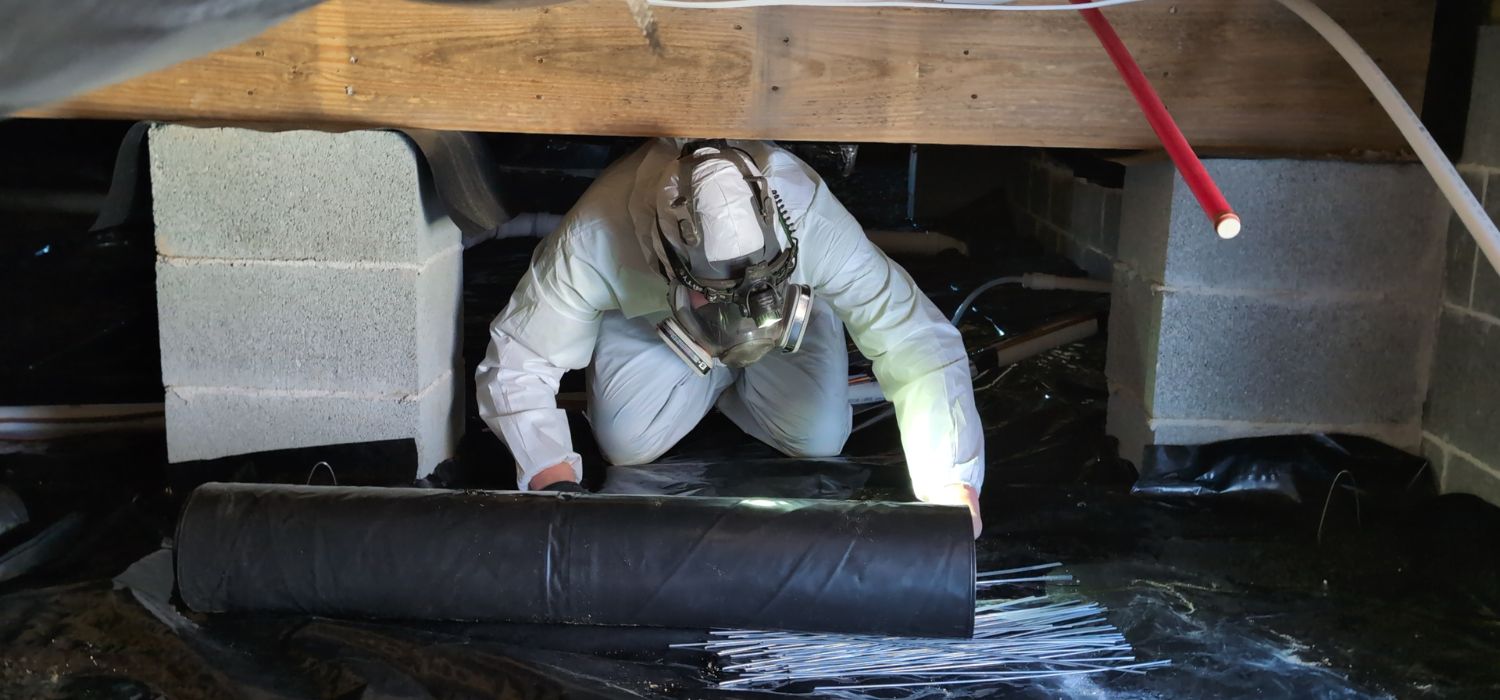
You can definitely handle installing vapor barriers yourself, but be ready for some work. It involves a lot of time on your hands and knees in a cramped space. It’s always a good idea to bring a friend to help you out.
First, get your equipment and tools ready. Check the safety data sheets for any products you use. Reading safety data is always a good first step.
Then, you’ll need to buy a few materials. You may need to request product samples or data sheets from suppliers to choose the best one.
Once you’ve gathered all the necessary items, you can begin the installation process. You can follow these installation guidelines, but we always recommend reaching out to a professional insulation contractor, like us, to do the work.
Your local climate plays a big role in how you should approach moisture control. In cold climates, the focus is on preventing moisture from inside the home from getting into the walls and attic. In these colder climates, a vapor retarder is usually placed on the warm side of the insulation.
In humid climates, the challenge is often stopping high outdoor humidity from getting into the home. For crawl spaces, the ground is a constant source of moisture regardless of the weather. This makes crawl space vapor barriers important in both cold and humid climates for effective moisture control.
It’s also useful to know the difference between a vapor retarder and a product like house wrap. House wrap on exterior sheathing functions primarily as an air barrier and a water-resistive barrier, protecting the structure from rain while allowing water vapor to escape.
You might hear people talk about crawl space encapsulation, which some case studies show to be highly effective. This is a much bigger project than just installing a vapor barrier. Encapsulation seals the entire crawl space, including the walls and support piers.
It uses a thicker plastic, usually 10 mils or more, and the job is almost always done by professionals. It also includes sealing off crawl space vents and adding a dehumidifier to actively condition the air. This creates a completely clean and dry space suitable for storage.
A vapor barrier is made to help stop water vapor, not pools of liquid water. If you see standing water in your crawl space, you have a different problem. This could be from leaky pipes, poor exterior grading, or a high water table in your area.
You’ll need to fix the source of the water first. This might mean repairing plumbing or improving the drainage around your foundation. For persistent groundwater issues, especially with concrete block foundations, this could mean installing a drainage system with a sump pump.
Your crawl space has a big impact on the rest of your house. By stopping ground moisture with a proper vapor barrier, you’re taking a crucial step to prevent mold, rot, and pests. This improves the health of your home’s entire building envelope.
Installing one of the available crawl space vapor barriers is a smart and effective way to protect your home’s health. It also preserves your home’s value for years to come, and is a foundational project for any homeowner looking to maintain a dry and healthy living environment.
Address: 3922 Puddledock Rd, Prince George, VA 23875
Phone:804-862-4493
Business Hours:
Mon - Fri: 7:00 AM to 6:30 PM
Sat-Sun: Closed
GreenSky Financing
5% off Military, Veteran, First Responders